


Nov
8 Steps to Assemble the Homestead Chicken Coop
To assemble your coop, you’ll need a drill or battery-powered screwdriver with a Phillips head bit. All screws are included, and a printed copy of the instructions is provided in the carton.
Cartons 1 and 2 hold the asphalt roof panels. Cartons 3, 4 and 5 contain a mix of the timber side walls, wire mesh panels and smaller components such as the ramp and ladder.
Step 1: Building the Foundation

Mark out the area in your yard and using either timber or pavers set out a firm foundation for the frame to stand on.
Make sure it’s level and all the corners are square.
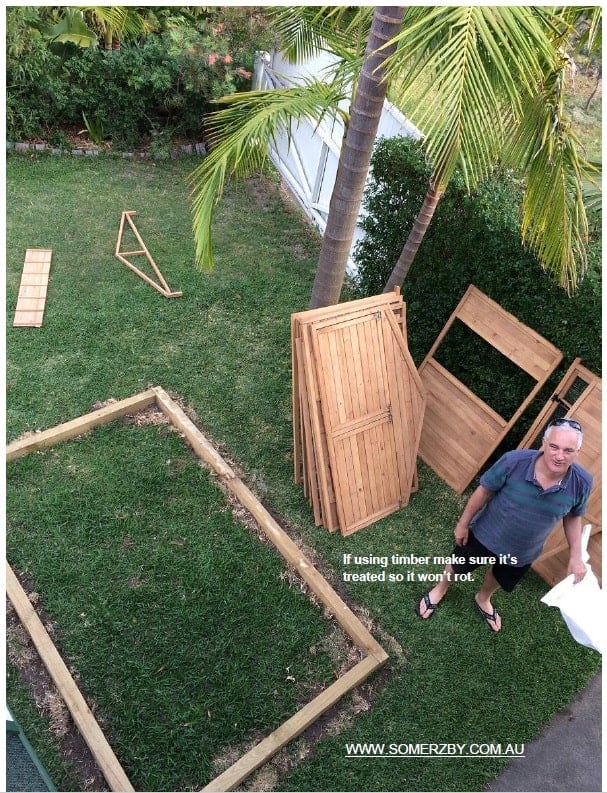
If using timber make sure it’s treated, which will prevent it from rotting.
Keeping the chicken coop off the ground is not essential, but it is a good idea.
We’ve used a 200mm x 70mm treated pine timber section from Bunnings, and please note these timber sections are not included with the Somerzby chicken coops.
Squaring the Corners

All the corners should be fixed together well using a corner bracket or screws.
It’s important that the base is level. Walls, floors and roofing will fit and work much better sitting on a level base/foundation.
Step 2: Assembling the Walls

Position and attach the external wall panels making sure all corners are square and are on a level base / foundation.
The internal wall and coop flooring is then attached to the external walls
Step 3: Attaching the Nesting Box

Fix the nesting box walls and floor to the side wall panel.
Once the walls are attached, fix the hinged opening roof assembly to the nesting box.
Step 4: Add the Ramp and Ladder

Attach the pre-made ramp and ladder to the bottom rail of the interior wall panel.
Step 5: Attaching the Side Wire Mesh Walls

Attach the mesh walls to the side panels using the fasteners supplied.
Ensure the walls sit firmly on the ground, pavers or timber foundation.
Step 6: Attaching the End Walls and Door
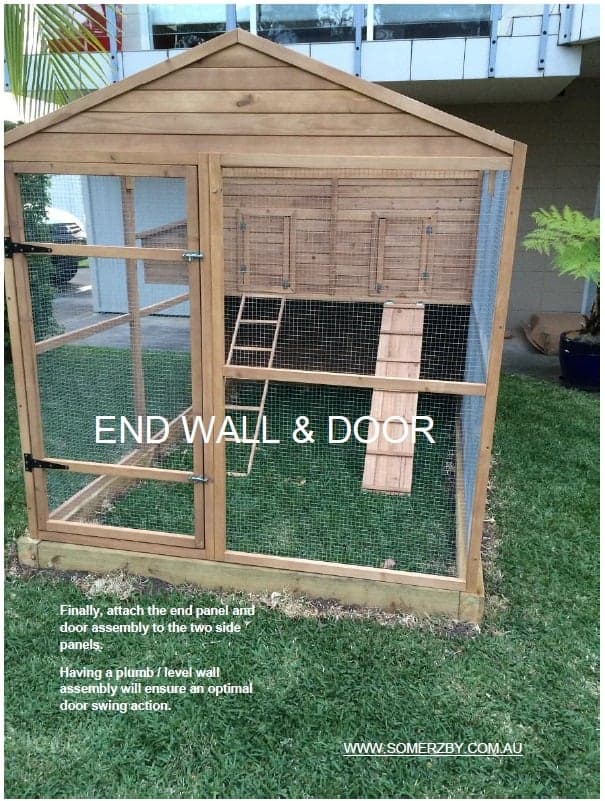
Finally, attach the end panel and door assembly to the two side panels.
Having a plumb/level wall assembly will ensure an optimal door swing action.
Step 7: Fitting the Roofing Panels

Once all four walls are assembled, the roof can then be attached. A properly squared and well-aligned frame will help to ensure the correct positioning of the roofing panels.
You may need a step ladder to reach the roof caps.
Step 8: Check Everything is Working Correctly
Once all the wall and roofing panels have been fastened, it’s time to test that all the doors and openings are working.
Also, check to make sure all screws and fasteners have been properly secured.

Time to admire your handy work! You have finished building a new quality coop for your flock of chickens.
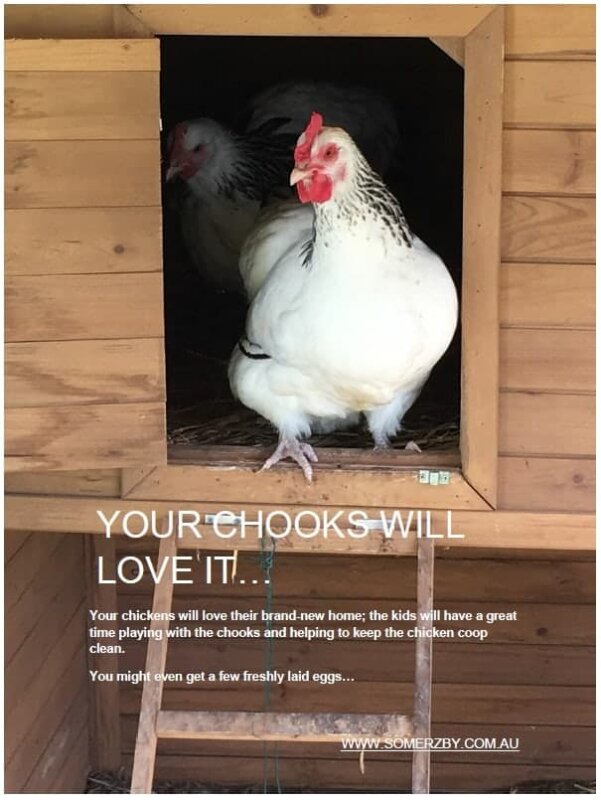
Your chickens will love their brand-new home; the kids will have a great time playing with the chooks and helping to keep the chicken coop clean. You might even get a few freshly laid eggs!

Take a photo of your coop and share it with us. We may even feature it on our social media!
Assembling the Homestead chicken coop is straightforward when you follow each step carefully. With the included instructions, a battery-powered screwdriver and a little patience, you’ll have a sturdy, spacious home ready for your flock in no time.
Once complete, you can enjoy watching your chickens thrive in a safe and comfortable environment, knowing your hard work has set them up for years of happy, healthy living.
If you need any help with assembly, our friendly Australian team is here to make it easy. Give us a call or send an email Monday to Friday. We all have hands-on experience assembling our products and are happy to guide you.
Related Blogs


Thankyou for the information my post code is 5086 could you also give me the price of the Somerzby